Thursday, March 20, 2014

Carrot Oatmeal Raisin Cookies

Wow, time really flies when you have a toddler! I feel like just yesterday I was telling you all how my holiday projects were finished so I could spend some more time blogging... Then so much more started happening around here that my plans flew right out the window, and here it has been over a month since I've posted again! Now I've completed another big project and I'm really appalled at the number of posts that I've back-logged for myself. This time instead of trying to play catch up and just ending up with more new post ideas piling up, I'm deciding to start with new material and work my way back to revisiting some of my older ideas as I get back into the swing. Alright, enough about me, let's get to the reason you're reading this post - cookies!


I was shredding some carrots to make egg rolls a few days ago (if you haven't tried them yet, here's a link to that recipe for you. I know, you're here for a cookie recipe, but trust me on this one...) and as I was using my Kitchenaid attachment to avoid shredding my fingers, which I always do when I use a hand grater, I was admiring the growing pile of pretty orange and yellow shreds. I started thinking to myself that it might be nice to make some muffins or something with these lovely carrots, so I shredded an extra pile of them and tossed them in a container in the fridge to consider my options while I finished the egg rolls. 

See what I mean? They're just begging to be made into something nice!

The next day, I was all set to start making muffins when inspiration struck: what if I made a cookie?! Something with oats, a little breakfasty, not really sweet, something that would make a great healthy snack during my husband's long work days (that he would also enjoy eating)... So I started searching for recipe ideas. The one I found on the Quaker website was closest to what I was looking for, but I still tweaked it a little to really get what I wanted. I asked my husband to really critique them while he ate the first batch, because I had enough carrot already shredded to make a second batch, and I wanted to know if there was anything he'd like me to do differently. The verdict: great texture, perfect amount of raisins, delicious flavor. There wasn't anything he would change, except maybe sprinkle a little cinnamon sugar on a few to see how they were as more of a dessert. So I'm adding this one to the list of 'make often' and I hope you like it too!
  
Start by putting your raisins in a bowl and covering them with hot water. This will allow them to rehydrate and plump while you get everything else ready. Here's a side by side view of why this is a good idea:

Combine all the dry ingredients in a bowl and set aside. 


In your mixing bowl, cream together the honey and shortening of your choice (I use coconut oil). 


Beat in the egg, vanilla, and applesauce, then add the carrots and mix well. 


Stir in the dry ingredients all at once, mixing just until combined. 


Drain the raisins, and fold them in. 


Drop by spoonfuls (or use a cookie scoop like I do) onto a parchment lined baking sheet and spread to your desired shape. They should puff just a little, but the cookies will not spread out as they bake, so whatever shape they go into the oven is the shape they will come out.


Bake in a preheated 350* oven for 10-12 minutes, until edges are just starting to brown and center is set. 


Half of the second batch got a sprinkle of cinnamon sugar on top just before baking, here they are after:


Allow to rest on the pan for a few minutes before transferring to a rack to cool completely. Store in an airtight container. These cookies are at their best when eaten fresh, within three days of baking. Hubby's final verdict was that the first day, they are perfect without the cinnamon sugar, and the third day they are better with the cinnamon sugar. 

And here's the recipe for you:

Carrot Oatmeal Raisin Cookies

2 Cups old fashioned rolled oats
1 Cup whole wheat flour
2 Tbsp ground flax seed meal
1 tsp baking soda
1 tsp baking powder
1/2 tsp salt
1/2 tsp ground cinnamon
1/2 tsp ground nutmeg
1/2 tsp ground ginger
1/4 tsp ground cloves
1/4 Cup honey
1/4 Cup coconut oil (or your preferred shortening)
1 egg
1/3 Cup unsweetened applesauce
1 tsp vanilla
1 Cup shredded carrot
1/2 Cup raisins

Put raisins in a small bowl with enough hot water to completely cover them, set aside. 
Combine all dry ingredients in a medium bowl, set aside. 
In a mixing bowl, cream together honey and coconut oil. Beat in egg, applesauce, and vanilla. Add carrots and mix well. Add dry ingredients all at once, mix just until combined. Drain raisins, then fold them into dough. 
Preheat oven to 350*. 
Drop dough by spoonfuls or cookie scoop onto a parchment lined baking sheet, and spread to desired shape (cookies will not spread while baking). Bake 10-12 minutes, until edges are just starting to brown and center is set. Allow to cool a few minutes on pan before transferring to a rack to cool completely. 
Store in an airtight container. Cookies are best within three days of baking. 

Enjoy!                                            
Sue

Friday, February 14, 2014

Happy Valentine's Day!


Chocolate has to be my favorite Valentine tradition, and what food blog would be complete without a little participation? Since hubby loves my chocolate covered blueberries so much, and I happened to find some really nice blueberries a few days ago, I decided to surprise him with a batch. And since it's Valentine's Day, I wanted to make them really special, so I made a bowl for them out of chocolate covered pretzels!


You can see the step by step instructions/recipe for the chocolate covered blueberries here. For the pretzel bowl, follow the same method used for dipping the blueberries, and just set the dipped pretzels onto a plastic-wrap-covered upside down bowl of the size you desire, ensuring there is plenty of chocolate between the pretzels to keep them solidly stuck together. Allow to set completely before removing from the bowl and filling - refrigerate for a faster set. (Sorry I don't have photos of this process, I was trying to get this project completed quickly this morning so I'd have time for it to set to make it to hubby's lunch break for his surprise)! 


I hope you all have a wonderful Valentine's Day! More new recipes are on their way to you soon!

Enjoy!                                            
Sue

Thursday, January 30, 2014

Chicken Creole Soup

I too have been missing in action for a while. Things have been crazy around here since Thanksgiving. And boy has it been super cold here in New Hampshire! I can't wait for warm weather! 

I don't think it's going to slow down for a while, as I have begun taking online classes at my local community college. I have entered into the Medical Coding Certificate Program and should be able to complete all my classes in just over a year. As a result, I will more than likely have less time to devote to blogging. I really love sharing recipes with all of you, and I plan to blog as much as possible while taking classes, but it may be few and far between until I have school breaks. But I figured since I have a few min right now while my son is watching cartoons, I would share a recipe for one of my families favorite soups. 

I have made this soup a number of times, and each time it is perfect. Before I had our son, I made this soup a little spicier. But in the hopes that he would eat it, I went a little easy on the spice this time. The recipe as follows is the way I made it last night. It has a subtle spice (feel free to make it spicier if you want), but it's not too spicy. 

Also, as a little note, this makes A LOT of soup. There are only 3 of us, so after we had dinner last night I had two 6 C buckets and a 3 C bucket leftover. Now that is a lot of soup! You could totally cut this in half if you don't want that much soup, but we like to put leftovers in the freezer for a quick go-to meal when there is not much time to pull a meal together on a crazy hectic day. If you do choose to freeze some, when you reheat it in a pot, you may want to add some water or chicken stock to it to make a soup consistency again. We like to serve this with nice crusty rolls to complete the meal. 

I apologize for the lack of photos. I was trying to pull this together quickly with a toddler who likes to "help". 


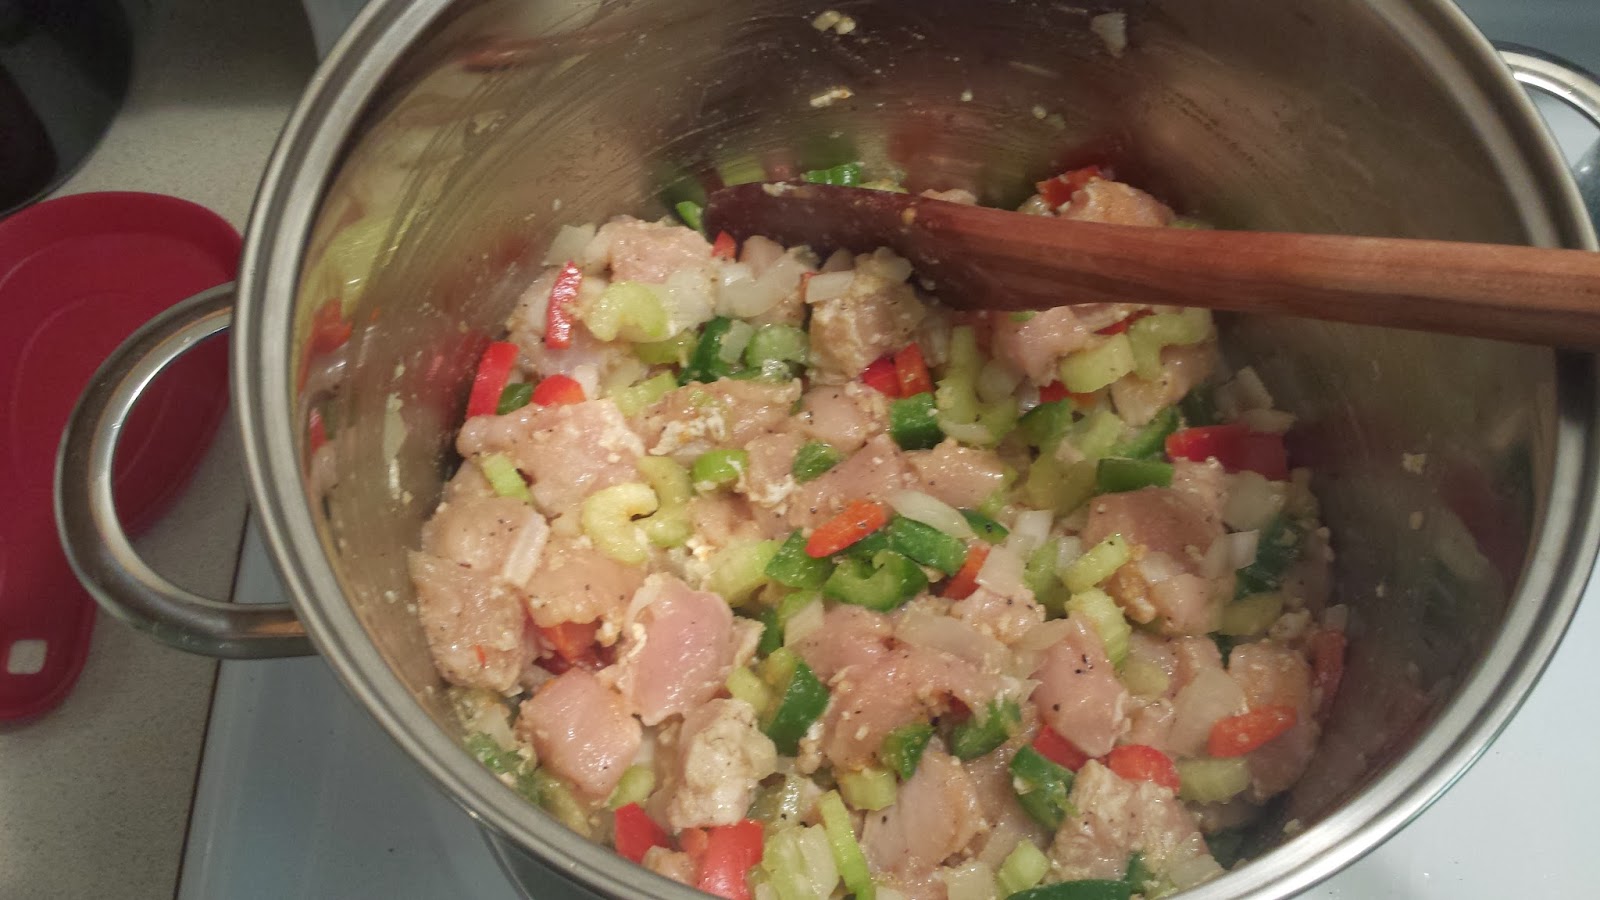
This is the first stage of the process. Saute the onions, peppers, celery, minced fresh garlic, and chicken in a couple tablespoons of olive oil with a little salt, pepper and garlic powder. I know, your thinking fresh minced garlic AND garlic powder?! Yup. We like garlic in this house. If you don't like garlic that much, feel free to add less or leave it out or use only one type of garlic. 
Make sure you start with a large enough pot for this.....The first time I made this soup I had to switch pots halfway through because I didn't have enough room for the liquid.... The pot I use for soups is a large stainless steel stock pot. It is large enough to fit a whole turkey carcass for making stock.  


And this is actually one of the leftover buckets that we put in the freezer. But the time the soup was done, our son was antsy and ready for dinner, so I forgot to get a picture of it in a pretty bowl. 
The rice soaks up a lot of the juice in the soup, so feel fee to add less rice or more liquid. 

And here's the recipe. 

Chicken Creole Soup
(adapted from Betty Crocker)
2 T olive oil
1 med onion, chopped
2 large stalks celery, chopped
1/2 each green and red bell pepper, chopped
2 t finely chopped garlic
2 1/2 lb boneless, skinless chicken breasts or thighs, cut into 1” pieces
Salt, pepper and garlic powder to taste
1/4 C flour
2 14 oz cans diced tomatoes, undrained (I used 1 can of jalapeno diced tomatoes and 1 can plain diced tomatoes)
4 C chicken broth or stock
3 C water
1 1/4 C uncooked regular long grain white rice
1/4 t cayenne pepper (add more if you like it spicy or even add hot sauce)
2 dried bay leaves

In 5-6 qt large dutch oven or stock pot, heat olive oil over med-high heat. Add onions, celery, bell pepper, garlic and chicken sprinkle with salt, pepper and garlic powder to taste; cook 7-9 min, stirring frequently, until onion begins soften. Stir in flour. Cook 5-6 min stirring constantly until flour begins to turn light brown. Stir in remaining ingredients. Heat to boiling. Reduce heat to med-low. Cover and cook 15-20 min stirring occasionally, until rice is tender and chicken is no longer pink in center. Remove bay leaves before serving. Taste and add salt to taste, if needed.
We serve this with warmed crusty rolls.


Enjoy!                                            

Sandi 

Tuesday, January 28, 2014

Oatmeal Whole Wheat Pancakes

I have a handful of post drafts that I have begun but not managed to complete, as well as additional photos that I have yet to even begin drafts for. I'm working on it... So when I heard that today was National Blueberry Pancake Day, and since I found these pretty blueberries yesterday, I thought it was appropriate to celebrate with blueberry pancakes for breakfast!

Making pancakes from scratch really is quite easy, and all it takes to make it as quick as using a boxed mix is a little preparation ahead of time - you can mix up the dry ingredients and keep them in an airtight container. In my opinion, making anything from scratch really is worth the small amount of extra effort.

These particular pancakes have more texture and more 'stay with you' filling power than your traditional white pancake. They also freeze well, and are excellent reheated in the toaster (although usually I do this with them when I haven't added blueberries, so be cautious of the blueberry juice leaking if you do not have a toaster oven). 

Start by combining your dry ingredients in a large bowl and your liquid ingredients in a measuring cup or small bowl. 

Stir together the dry ingredients, then add the whisked liquids all at once, and stir just until combined. If the batter is too thin, stir in a small amount of additional all purpose flour. For this batch, I used ~3/4 cup total all purpose flour. 

Pour or spoon the batter onto a preheated griddle or skillet (I use a nonstick griddle, but if you use a different type of skillet you will probably need to use oil or butter to keep the pancakes from sticking). Sprinkle fresh blueberries over the top of each pancake (or another fruit, or just leave them plain).

You can see the very edges starting to look dry in the above photo, and a couple bubbles popping over the surface. When this effect spreads over more of the surface it's ready to flip.

Allow the pancakes to finish cooking on the second side, and then flip them blueberry side up to serve.

And here's the recipe:

Oatmeal Whole Wheat Pancakes
1 cup whole wheat flour
1 cup old-fashioned oats
¼-1 cup all purpose flour (to desired consistency)
1 tablespoon brown sugar
1 teaspoon baking soda
1/2 teaspoon baking powder
2 eggs
2 cups milk or buttermilk (or your favorite milk alternative)
1/4 cup olive oil
Fresh blueberries or other fruit (optional)

Combine dry ingredients in a large mixing bowl (start with the smaller amount of all-purpose flour). Store in an airtight container until you're ready to make pancakes. Whisk the eggs, milk, and oil in a measuring cup or small bowl, and stir into dry mix just until combined. Stir in additional all purpose flour as needed to reach the correct batter consistency. 

Pour or spoon the batter onto a preheated griddle or skillet (I use a nonstick griddle, but if you use a different type of skillet you will probably need to use oil or butter to keep the pancakes from sticking). Sprinkle fresh blueberries over the top of each pancake (or another fruit, or just leave them plain).
When bubbly and starting to look dry, flip pancakes and allow to finish cooking on the second side. Serve fruit side up. 

Store leftovers in an airtight container in the fridge, or freeze for a conveniently fast and delicious breakfast or snack. 

Enjoy!                                            
Sue

Saturday, January 4, 2014

Salmon Burgers

Hello again! I know, I've been missing in action for a while now, but I should be able to dedicate my free time to blogging again. We survived a family round of colds, including my little one's first. We traveled home to visit family in Maine for the holidays and got to experience a week of true winter that we've missed being in California - we arrived on the first night of freezing rain that began a doozy of an ice storm that knocked out our power for the rest of our week-long visit! It was a beautiful winter wonderland with everything covered in ice, and then we got a pretty layer of fluffy snow on top of it for Christmas. The power was restored to our family's home promptly after we returned to California, where we enjoyed sunshine and mid-60-degree weather to chase away our jet lag. 

Now, to celebrate my return to the blogosphere, I've decided to share with you an original recipe of mine that is really quick and easy to make, and so yummy. These salmon burgers even make good leftovers!

Start with about one pound of salmon (if you purchase it with the skin, get closer to 1.5 pounds to allow for the weight of the skin you will remove). Grind the salmon if you have a grinder, otherwise just chop it as finely as you can. Add the zest of one lemon, a healthy sprinkle of dried parsley, two grated cloves of garlic, and a dash of crushed red pepper flakes to taste. 

Mix all the ingredients thoroughly and divide into four or five equal portions. I generally make five, but if you ended up losing more when removing the skin you may decide to make four.

Shape each ball into a patty and place on a hot skillet. I use one with raised grill lines, but a flat one would do the trick. Leave the patties alone until they are mostly cooked, so that only the very top is uncooked, then flip them and allow them to finish cooking on the second side. If you try to move them around more than this, they will fall apart on you, so resist the urge. 

This is why I really like the grill-skillet, you get these lovely lines on the finished burgers.

Serve with your favorite toppings - mine are fresh spinach and a nice thick slice of heirloom tomato - and enjoy!


Now here's the handy recipe for you:
SALMON BURGERS
1-1.5 pounds salmon, skin removed, ground or finely chopped
Zest of one lemon
2 cloves garlic, grated
Dried parsley to taste
Crushed red pepper flakes to taste
4 or 5 sandwich buns and your favorite toppings

Combine all ingredients. Divide into 4-5 equal portions. Preheat a skillet, shape each ball into a patty and place on hot skillet. Allow to cook most of the way through before flipping to cook on the second side. Serve with your favorite toppings on lightly toasted buns. 

Enjoy!                                            
Sue

Tuesday, December 31, 2013

Happy New Year!!!


Wishing you all a very 
Happy New Year!! 
Stay safe, be healthy 
and have a 
remarkably fabulous 2014!

My husband and I have never been party going people. Every New Year's Eve we order Chinese take-out and watch the ball drop on tv. 

What are your New Year's Eve plans? Do you have any traditions for New Year's Eve? 


Happy New Year from the Saucy Sisters Family Kitchen
Sandi and Sue 

Wednesday, December 25, 2013

Merry Christmas!


Wishing you all a 
very Merry Christmas 
and a happy, healthy New Year! 

Thank you all for bearing with us during this incredibly busy time in our lives and busy time of year. With both of us having very active toddler boys, it is quite often we don't seem to be able to do much else than run after our boys. We love cooking and sharing our recipes and stories with you all, so please rest assured we haven't gone anywhere. We are still in our kitchens cooking, testing and photographing at any chance we have. 
We have been traveling and had family and friends coming and going throughout this holiday season and will resume posting fabulously yummy home cooked goodies when our schedules return to normal. 

Thank you again for bearing with us and for visiting our little corner of the world. 

Merry Christmas from our families to you and yours. 

Sandi and Sue